Sunday, January 24, 2021

The New Motor Glider Winter Project Part 3

 With the snow cleared from my driveway this morning and another project sitting on my work table in my shop I thought it best that I get this last posting out to show you how my new motor glider project turned out.  So here you go.


With a lot of sanding and priming over and over again of the fuselage, I was more than happy to finally put the last coat of primer on and look as smooth as it does above.


With a bit of 3D printing I was able to get a very smooth looking nose for the fuselage as well.  Again the effort to smooth everything out has paid off.


Finally some color on the fuselage! The paint looks glass smooth and I am really happy it turned out as well as it did.  I laid down three coats of paint and then another three coats of clear.  The last photo above shows the nice mirror finish.  Since the plane will be belly landed I thought it best to lay down the clear coats to help protect the paint. 


With the canopy now smoothed out and painted gloss black it fits very well into the fuselage.  A nice look for the new plane.


With the addition of the folding prop I am really looking forward to getting this plane up in the air and into glide mode.  The motor for the plane is also set up with a motor brake so that I will be sure that the prop will stop when I throttle back to let the prop fold back as shown above. 


With the wing being seven feet long I need to bring it into my living room to get the photos you see above. Also with the new graphics that I worked out for the plane it will be easy enough to see it in the air and will be a looker even when it is on the ground.  


Since I put some nice graphics on the top of the wing I thought I might as well do something fun on the bottom surface as well. 

Other than having to balance the new motor glider everything else has been connected, tested, and ready to go. Total weight of the plane ready to fly comes in at 2 1/2 pounds.  Happy with that.

 Spring cannot get here soon enough for me to do the maiden flight.  Hope you like how the plane turned out as much as I do.  


Wednesday, January 20, 2021

The New Motor Glider Winter Project Part 2

 With the plug completed for the motor glider fuselage that I wrote about in the first installment of this project now my attention turned to actually making the fiber glass molds to make the fuselage.  With the fuselage being the same shape both on the top and bottom I had to figure out how to make the canopy and the openings where the wing would be attached to the fuselage.  So here is how it all went. 


After the fiber glass on the fuselage plug had cured over night I was able to remove the finished mold for the bottom of the fuselage.  I used a small strip of wood and attached four Styrofoam forms on the bottom of the mold so that it would not wobble around on my work bench when I wanted to make the fuselage bottom in the mold. 


To make the canopy for the top of the fuselage I needed to lay out the shape of the outer edge of the canopy on the plug with a Sharpie pen as shown in the photo above.  


With the guide lines on the plug I next laid down a barrier of modeling clay to make a flange for outer perimeter of the canopy. 


Laying the clay down was tricky to say the least.  But I slowly worked it into shape. Got it nice and smooth or at least the best that I could so I could prep it to lay fiber glass to make the canopy and flange.


Here the fiber glass and resin had been applied to the plug to create the canopy. 

At this point I did not get photos of the next steps in the build. But the simplest way I can explain what I did was that I let the canopy cure over night and then trimmed it off without removing it from the plug.  Then I prepped the rest of the plug so that it I could fiber glass around the canopy and also set up a clay barrier for the opening that would allow access to the servos and make a proper profile for the wing to settle into the top of the fuselage and again make flanges for the mold.  


Here is how the top of the fuselage turned out once I had removed it from the fuselage plug.  I was concerned that I would not be able to remove the canopy from the plug with the top of the fuselage flanges on the plug surrounding the canopy.  

The project making Gods smiled down on me and I had managed to make it all work as the canopy and fuselage top molds popped off of the plug easy as could be.  At this point I was pleased as punch that these complicated parts had turned out so well.  I only needed to make the bottom of the fuselage mold next and that would be a simple task since the bottom had no crazy openings like the top section and canopy.


With the top fuselage mold complete I then had to figure out how to actually use it.  The openings needed to be closed up so that I could make the actual fuselage top. 


To close up the openings I simple took some card stock covered with packaging tape and clamped it to the mold as shown above.  This would make it easy to remove the finished part from the mold as the new part will not stick to the smooth packaging tape thanks to the mold being so smooth and using mold release fluid before laying fiber glass into the mold for the part I wanted to make. 


Here's what the top of the new motor glider fuselage looked like after I had removed it from the mold.  As you can see putting the card stock in to fill the opening worked out very well as now these opening had been closed up.  I needed this to happen so that I could make a proper lip around the openings for the canopy and the wing to rest on when they would be installed for flying.  So I cut these openings out again but left a lip to make it work out the way I planned.


Here the upper and lower halves of the fuselage were taped together to see how the fit up looked.  The fiber glass is thin enough so that the upper portion of the fuselage can be compressed into the bottom portion of the fuselage.  Having both the upper and lower portions of the fuselage be made from the same plug made this work perfectly.  I just taped these parts together at this point just to see if it would all work.  Again another plan had come together rather nicely.  Next to the fuselage you can also see the finished canopy on and off of the fuselage.   


In the two photos above you can see the fit up that I needed to do to get the canopy placed correctly into the top half of the fuselage. Also you can see the cut outs that I had made to the part so that I will have access to the battery compartment under the canopy and the servo area under the wing opening. 


In these images I started laying out the the motor mount, servo mounts, foam core bulkheads and the push rod tubes into the bottom of the fuselage.  This needed to be done before the fuselage was closed up otherwise it would be impossible to get these components into the fuselage. The servo mount was 3D printed and epoxied into place.  The motor mount at the nose of the plane was laser cut to hold the 1180kv motor.  A lot bigger motor than the one I used in the motor glider I flew last year.


Here's a close up view of the motor mount that I came up with.  I needed to be able to remove the motor if I needed without tearing the fuselage completely apart.  Luckily my design worked out very well as I am able to unbolt the motor from the inside of the fuselage without any issues to make it all work. 


Here's a good shot of the motor mount installed into the bottom section of the fuselage. I epoxied the motor mount into the fuselage, let it cure and the sand the fuselage flush with the motor mount in the end. 

So that's about it for today.  As you have seen so far there has been a lot of work that has gone into this build.  A lot of computer work went into the design so it has helped eliminate problems along the way when the actual build started.  Lots of computer time.  But all the planning helps solve issues before parts start to take shape.  So it is all worth the effort for sure that pays off in the end.  Stay tuned for the next installment in the next few days.


Tuesday, January 19, 2021

A New Motor Glider Design Winter Project

 Hello! Dave here once again. With winter in full force now here in the Midwest it is always good to have a new airplane project to work on to pass the time. Plus with everything else that is happening in the world this is even more so a necessity to keep ones sanity as well.  So I thought it best to get this post out about the new motor glider that I have been working on to show everyone what I have been up to.  


As most of you have already seen on the blog I have posted several times about the planes that I fly and I have managed to put together a very nice foam core motor glider that I had flown all last year (pictured above).  A great plane that has held up very well while learning the ins and outs of flying it.  

So with this being accomplished I decided to work on a new motor glider that would have a more aerodynamic wing, a fiberglass fuselage, a larger motor and battery along with a folding prop to improve it's glide performance. 


 Here are a few images of the design that I put together to work out how it would possibly look once completed.


I first started work on the new wing for the plane. I wanted a smoother more aerodynamic wing for the project so I worked on a test part to start.  The wing used a proper airfoil for gliders to start. I laser cut out the ribs for the wing that would be assembled in foam core sections.  I hot glued most of the wing together as shown above.  To seal up the wing the top surface of the ribs were epoxied and the top surface was folded over the entire wing section.


To hold the top surface of the wing in place while the epoxy was drying I taped the end surfaces down and then laid a towel over the wing and then added weight to the wing to secure it.  The "Toy" book seemed to be the right choice for pile of books in the photo above. 


Here you can see the difference in the smoothness of the new wing compared with the wing on the motor glider I flew last year.  Should be a better performer I suspect.


Here the wing sections have been put together and are ready for final assembly.  The wing tips were built the same way but are shaped a bit differently than the mid-sections of the wing you see here.


The new motor glider wing pictured above was hot glued and taped together to form the entire wing.  The assembly went together very well and I am happy how straight the wing turned out along with how light it is.  The wing tips shown here are tapered down to a smaller chord length and tipped at a proper angle for stability.  The only thing missing in this photo is the 3D printed wing tips that will be added later on in the construction.

Next step in the project was to build the mold for the fiber glass fuselage.  Here's how this all turned out. 


I started with ribs that I laser cut and mounted into slots on a wooden platform. Having designed all of the plane in Fusion 360 it was an easy task to make parts from the computer design. I only needed to make half of the fuselage plug as the top and bottom sections were exactly the same shape to start.


Next I cut 1/4" wide strips of foam core and hot glued them on to the ribs of the form.  This took some time and luckily was one of the steps that I find very relaxing to do.  Some people can't understand why I say this but it is fun for me to see this type of work start to take shape in a project like this. 


With this series of photos the plug for the fuselage is really starting to take shape.  Working with the foam core in this manner is very much like creating a wood striped canoe.  Same process just different material.  Easy to get the compound curves that I wanted for the fuselage plug. 


Here the plug for the fuselage mold has finally been covered completely with the foam core strips. The plug at this point was covered with a micro-balloon and resin mixture to fill all the voids that were in between some of the foam strips.  After that the plug was sanded smooth to prep it for fiber glassing. 


In the three photos pictured above I laid down a couple of layers of 4 ounce fiber glass cloth to give the plug a nice strong surface to start prepping it for more resin/putter mixture and then primer.


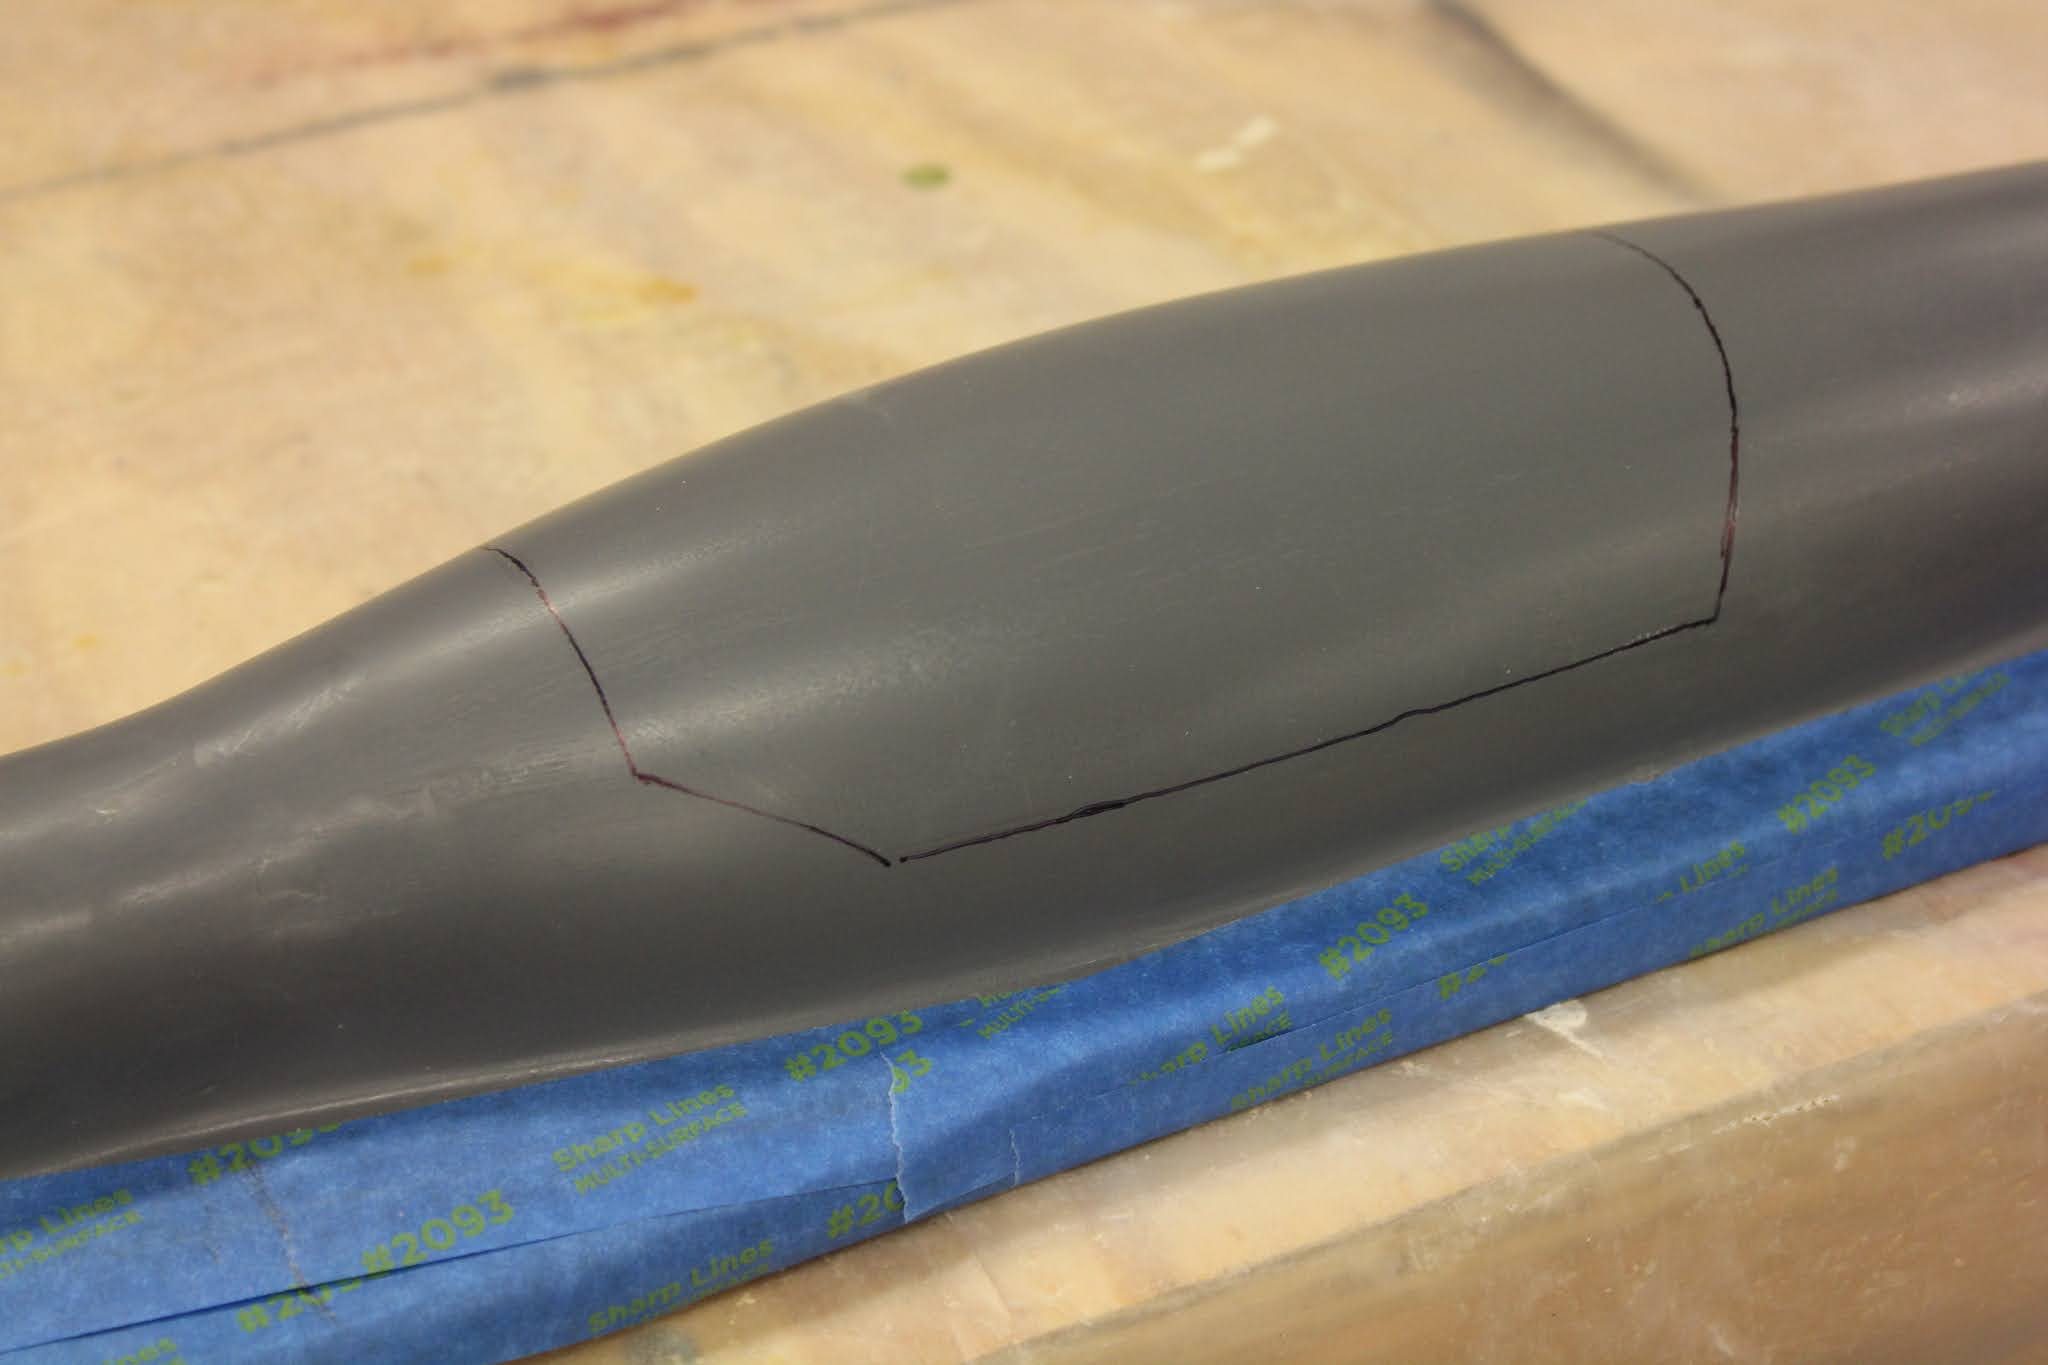
Here the fuselage plug has had several sessions of sanding and primer laid down.  Other than the glazing (red colored) putty on the part it is starting to smooth out very nicely.  


After many sessions of sanding, priming, sanding, priming over and over again the fuselage plug as you see it above was now ready to start making the molds for the fuselage. 

That's about it for today.  I will post the next installment of this project in a few more days once I get all the photos organized to get them ready for the next post.  There I will cover the completion of the fuselage and hopefully the final assembly.  I will just have to see how long the next post will be once I get that far.  Check back soon to see the next installment.


The New Motor Glider Winter Project Part 3

 With the snow cleared from my driveway this morning and another project sitting on my work table in my shop I thought it best that I get th...